Separation of Sitecore CD/CR in Local


Basically separating of Content Management from Content Delivery (CD and CM) is something that teams normally do in the actual environments like preprod /prod.
However sometiomes you need to separate them also in your local environment. The reason is for example you want to see if the publishing is properly coping items from Master DB to Web DB or not.
How distribution works
Once you setup a website, you have one server called CM which can be connected to Master or web database. Since we dont directly hack into Web db and everything goes through Master DB first so essentially CM is connecting to the Master db rather than Web DB.
when we want to see the final result in CD server we just publish CM master DB to the Web DB and then CD server will connect to the same Web DB and collect the content from web DB.
Fundamental solution
To see the Web DB content, We need to have another instance of the CM site but which has some differences from config perspective. It means the new instance will use existing DB and views and dlls.
Potentially should be exactly setup as the existing site is but connect to WEB Db instead of Master DB.
Then when in the local we work on the Master DB we wont see the effect in WEB Db unless we submit/approve and publish items and subitems.
Setup CD server (instance) pointing to Web DB
Steps:
1- Create a new instance using SIM
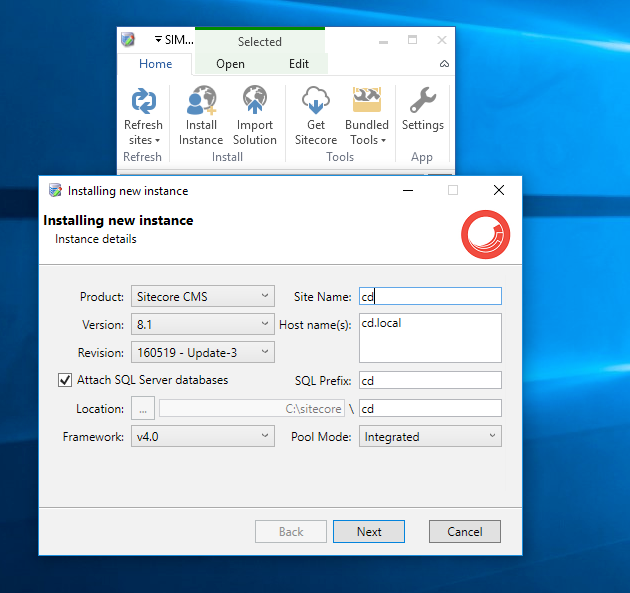
We change the location to a new folder since we need to point to different configs . However, the views, bin and other files are same and only the config are different.
Also we have to have different Host name to differentiate it with the existing site.
In the Setting tab of SIM every thing is as same as existing site like SQL DataSource, License and ....
In the Host Editor tab of SIM we need to create another host file with the new url but same IP :
127.0.0.1 my.local
127.0.0.1 cd.my.local
Generally it will create some new SQL databases for us but we will ignore it since later on we will change the connection string to the existing SQL DB.
It will also create IIS new site for you too which points to the newly created web folder.
2- Copy everything across to this new instance from your existing site. (maybe we need to override the configs later on)
3- Basically this would override the line in your my.Website.config file which is one of the main files in your site and it has the content like:
 <sites>
      <site name="my"
            patch:after="site[@name='modules_website']"
            hostName="cd.my*"
            targetHostName="cd.my.$(rootHostName)"
            database="master" virtualFolder="/"
            physicalFolder="/"
            rootPath="/sitecore/content/my"
            startItem="/Home"
            dictionaryPath="/sitecore/content/my/global/dictionary"
            dictionaryAutoCreate="true"
            domain="extranet"
            allowDebug="true"
            cacheHtml="true"
            htmlCacheSize="50MB"
            registryCacheSize="0"
            viewStateCacheSize="0"
            xslCacheSize="25MB"
            filteredItemsCacheSize="10MB"
            enablePreview="true"
            enableWebEdit="true"
            enableDebugger="true"
            enableTracking="true"
            disableClientData="false"
            cacheRenderingParameters="true"
            renderingParametersCacheSize="10MB"
            enableItemLanguageFallback="true"
            notFoundItem="/404" />
    </sites>
If you already setup the CD environemet for your actual server copy and replace that configs with your local App_config/include/project
otherwise create a new instance with higher proirity (priority only is determined by file name so you can add zz at the begining so it will get overrided. example: z.z.my.Settings with this content:
<?xml version="1.0"?>
<configuration xmlns:patch="http://www.sitecore.net/xmlconfig/">
  <sitecore>
    <sc.variable name="sourceFolder" value="C:\dev\My" />
    <sc.variable name="rootHostName" value="local" />

    <sites>
      <site name="mynrma">
        <patch:attribute name="database">web</patch:attribute>

      </site>
    </sites>
    <settings>
      <setting name="NRMA.Foundation.Installer.RestoreMongo" value="false"/>
    </settings>
  </sitecore>
</configuration>
we just need to point this site to the new hostName we created and point it to only web databse instead of master.
4- As discussed before, we need to change the website/app_Config/ConnectionString.config to point to the existing DB .
Problems you might come accross
When you navigate to the site you might get some error regarding Shared sessionstate InProc so in the local we can just turn it off or comment this part then both instances wont use same session.
5- Once you navigate to the new instance you only see the contents from Web Db , it means you need to publish items from CM.
6- Publishing:
Once you create any content in CM, you wont immidiately see the reflect in Web db.
If you are intrested in more detail you can open the my.local_web database and see when the new items which you created appear in the item table.
SELECT TOP 1000 [ID]
      ,[Name]
      ,[TemplateID]
      ,[MasterID]
      ,[ParentID]
      ,[Created]
      ,[Updated]
  FROM [nrma.local_web].[dbo].[Items]
  order by [Created] desc
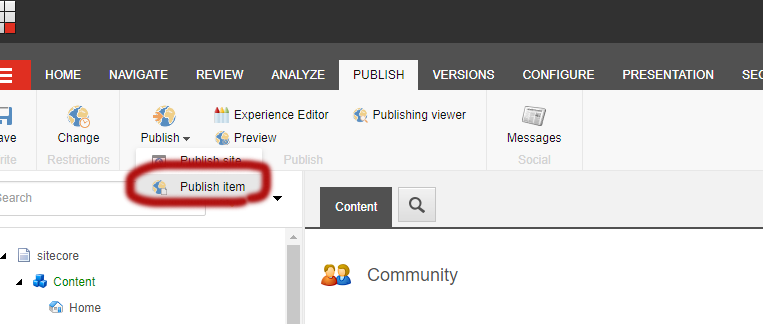
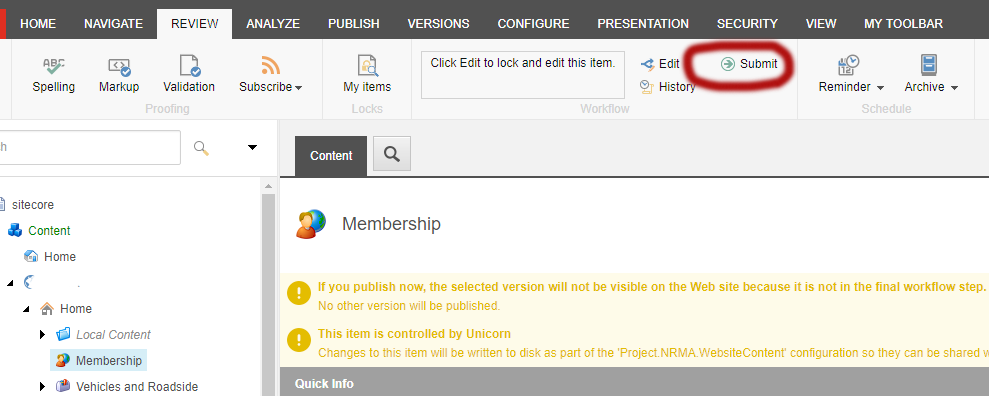
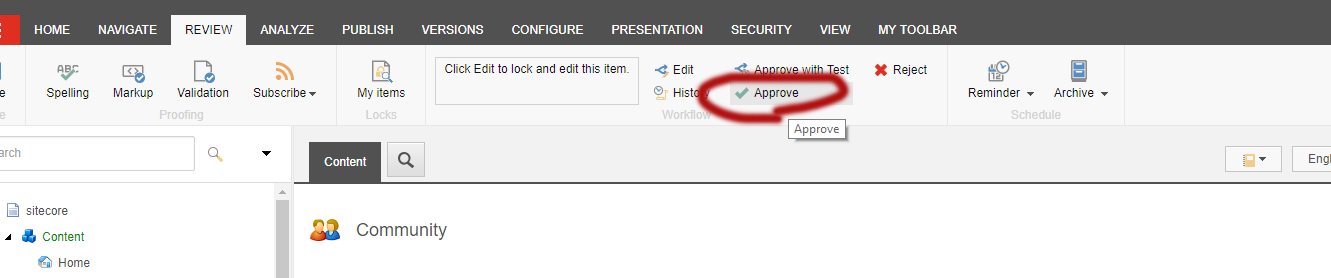
In order to get the items to the Web db you need to take two steps:
1- review=> submit/approve
2- publish items and subitems (especially when you delete an item, you need to publish the subitems too)