Deploy Node.js app in Azure App Service

There are some steps you need to take i order to make your website available in Azure App Service including set up the Azure CLI, Deployment user, resource group, App Service Plan, web app and Deploy your codebase. I will walk you through all steps.
Install Azure CLI
Prerequisite is installing Azure CLI .
WIth Azure CLI you need to login to your azur subscription.
az login
It will give you a link to Azure Potal and give you a code to input in the browser. Then you are logged in with your subscribed email which you can confirm.
Use Azure Shell
You can either use Azure Shell to execute the commands or login to Azure Portal and click on the very left button called cloud shell below:
Create a deployment user
az webapp deployment user show
If the result came up with NULL publishingUserName then you need to setup a user with deployment permission as below:
az webapp deployment user set --user-name MyUserName --password MyPassword
The username should be unique globally and does not need to be same as your Azure account. This deployment user will be later accissible through the portal from Web App=> Deployment Credentials
Create resource group
you need to have resource group which is a logical container (similar to a folder) into which Azure resources like web apps, databases, and storage accounts are deployed and managed. For example, you can choose to delete the entire resource group in one simple step later.
Not all regions offer you Free resource group so you can run a command to see the free regions:
az appservice list-locations --sku FREE
Then you can create a resource group:
az group create --name NodeStaticSite --location "Australia East"
Create App Service Plan
For a web app to run, it needs a App Service plan which is a set of compute resources. In the conventional web hosting context, these compute resources are analogous to the server farm. One or more apps can be configured to run in the same App Service plan. It is the same as Virual machine concept when you pick it to deploy your app into it. App Service plan is scalable to have more Virtual machines(instances) for my App Service.
When you create an App Service plan in a certain region (for example, Australia East), a set of compute resources is created for that plan in that region. Whatever apps you put into this App Service plan run on these compute resources as defined by your App Service plan. Each App Service plan defines:
Multiple App Services can map to the same App service plan
The App service plans are different based on Region, Number of VM instances, Size of VM instances (Small, Medium, Large), Pricing tier (Free, Shared, Basic, Standard, Premium, PremiumV2, Isolated, Consumption)
If you chose a free plan, it means you share the VM with other customers so the app receives CPU minutes on a shared VM instance and cannot scale out. See more
To create the App Service Plan run this command in Azure CLoud shell:
az appservice plan create --name NodeStaticSiteAppServicePlan --resource-group NodeStaticSite --sku FREE
sku FREE just point out to the Pricing Tier for your app.
You will get back a summary on your recently created App Service Plan. Here you can see a part of the summary:
{
  "adminSiteName": null,
  "appServicePlanName": "NodeStaticSiteAppServicePlan",
**  "geoRegion": "Australia East",**
  "kind": "app",
  "location": "Australia East",
  "maximumNumberOfWorkers": 1,
 ** "name": "NodeStaticSiteAppServicePlan",**
  "numberOfSites": 0,
  "perSiteScaling": false,
  "provisioningState": "Succeeded",
  "reserved": false,
**  "resourceGroup": "NodeStaticSite",**
  "sku": {
    "capabilities": null,
    "capacity": 0,
    "family": "F",
    "locations": null,
    "name": "F1",
    "size": "F1",
    "skuCapacity": null,
  **  "tier": "Free"**
  },
**  "type": "Microsoft.Web/serverfarms",**
}
In order to see all resources and service plans, you can login to Azure portal and look at resource group.
Create a web app
Everything is ready to create the most important part of the job which is the actual web app.
You need to introduce the run time which is supposed to run and execute your web app. To see the list of run times run the command:
az webapp list-runtimes
or to only get the names:
az webapp list --query [].name
The result can be different versions of aspnet, node, php,python, java and other libraries.
az webapp create --resource-group NodeStaticSite --plan NodeStaticSiteAppServicePlan --name SitecoreFrontEnd --runtime "NODE|8.1"
You will get back the hostNames plus more detail on your web app:
"availabilityState": "Normal",
  "clientAffinityEnabled": true,
  "clientCertEnabled": false,
  "containerSize": 0,
  "dailyMemoryTimeQuota": 0,
  "defaultHostName": "SitecoreFrontEnd.azurewebsites.net",
  "enabled": true,
  < JSON data removed for brevity. >
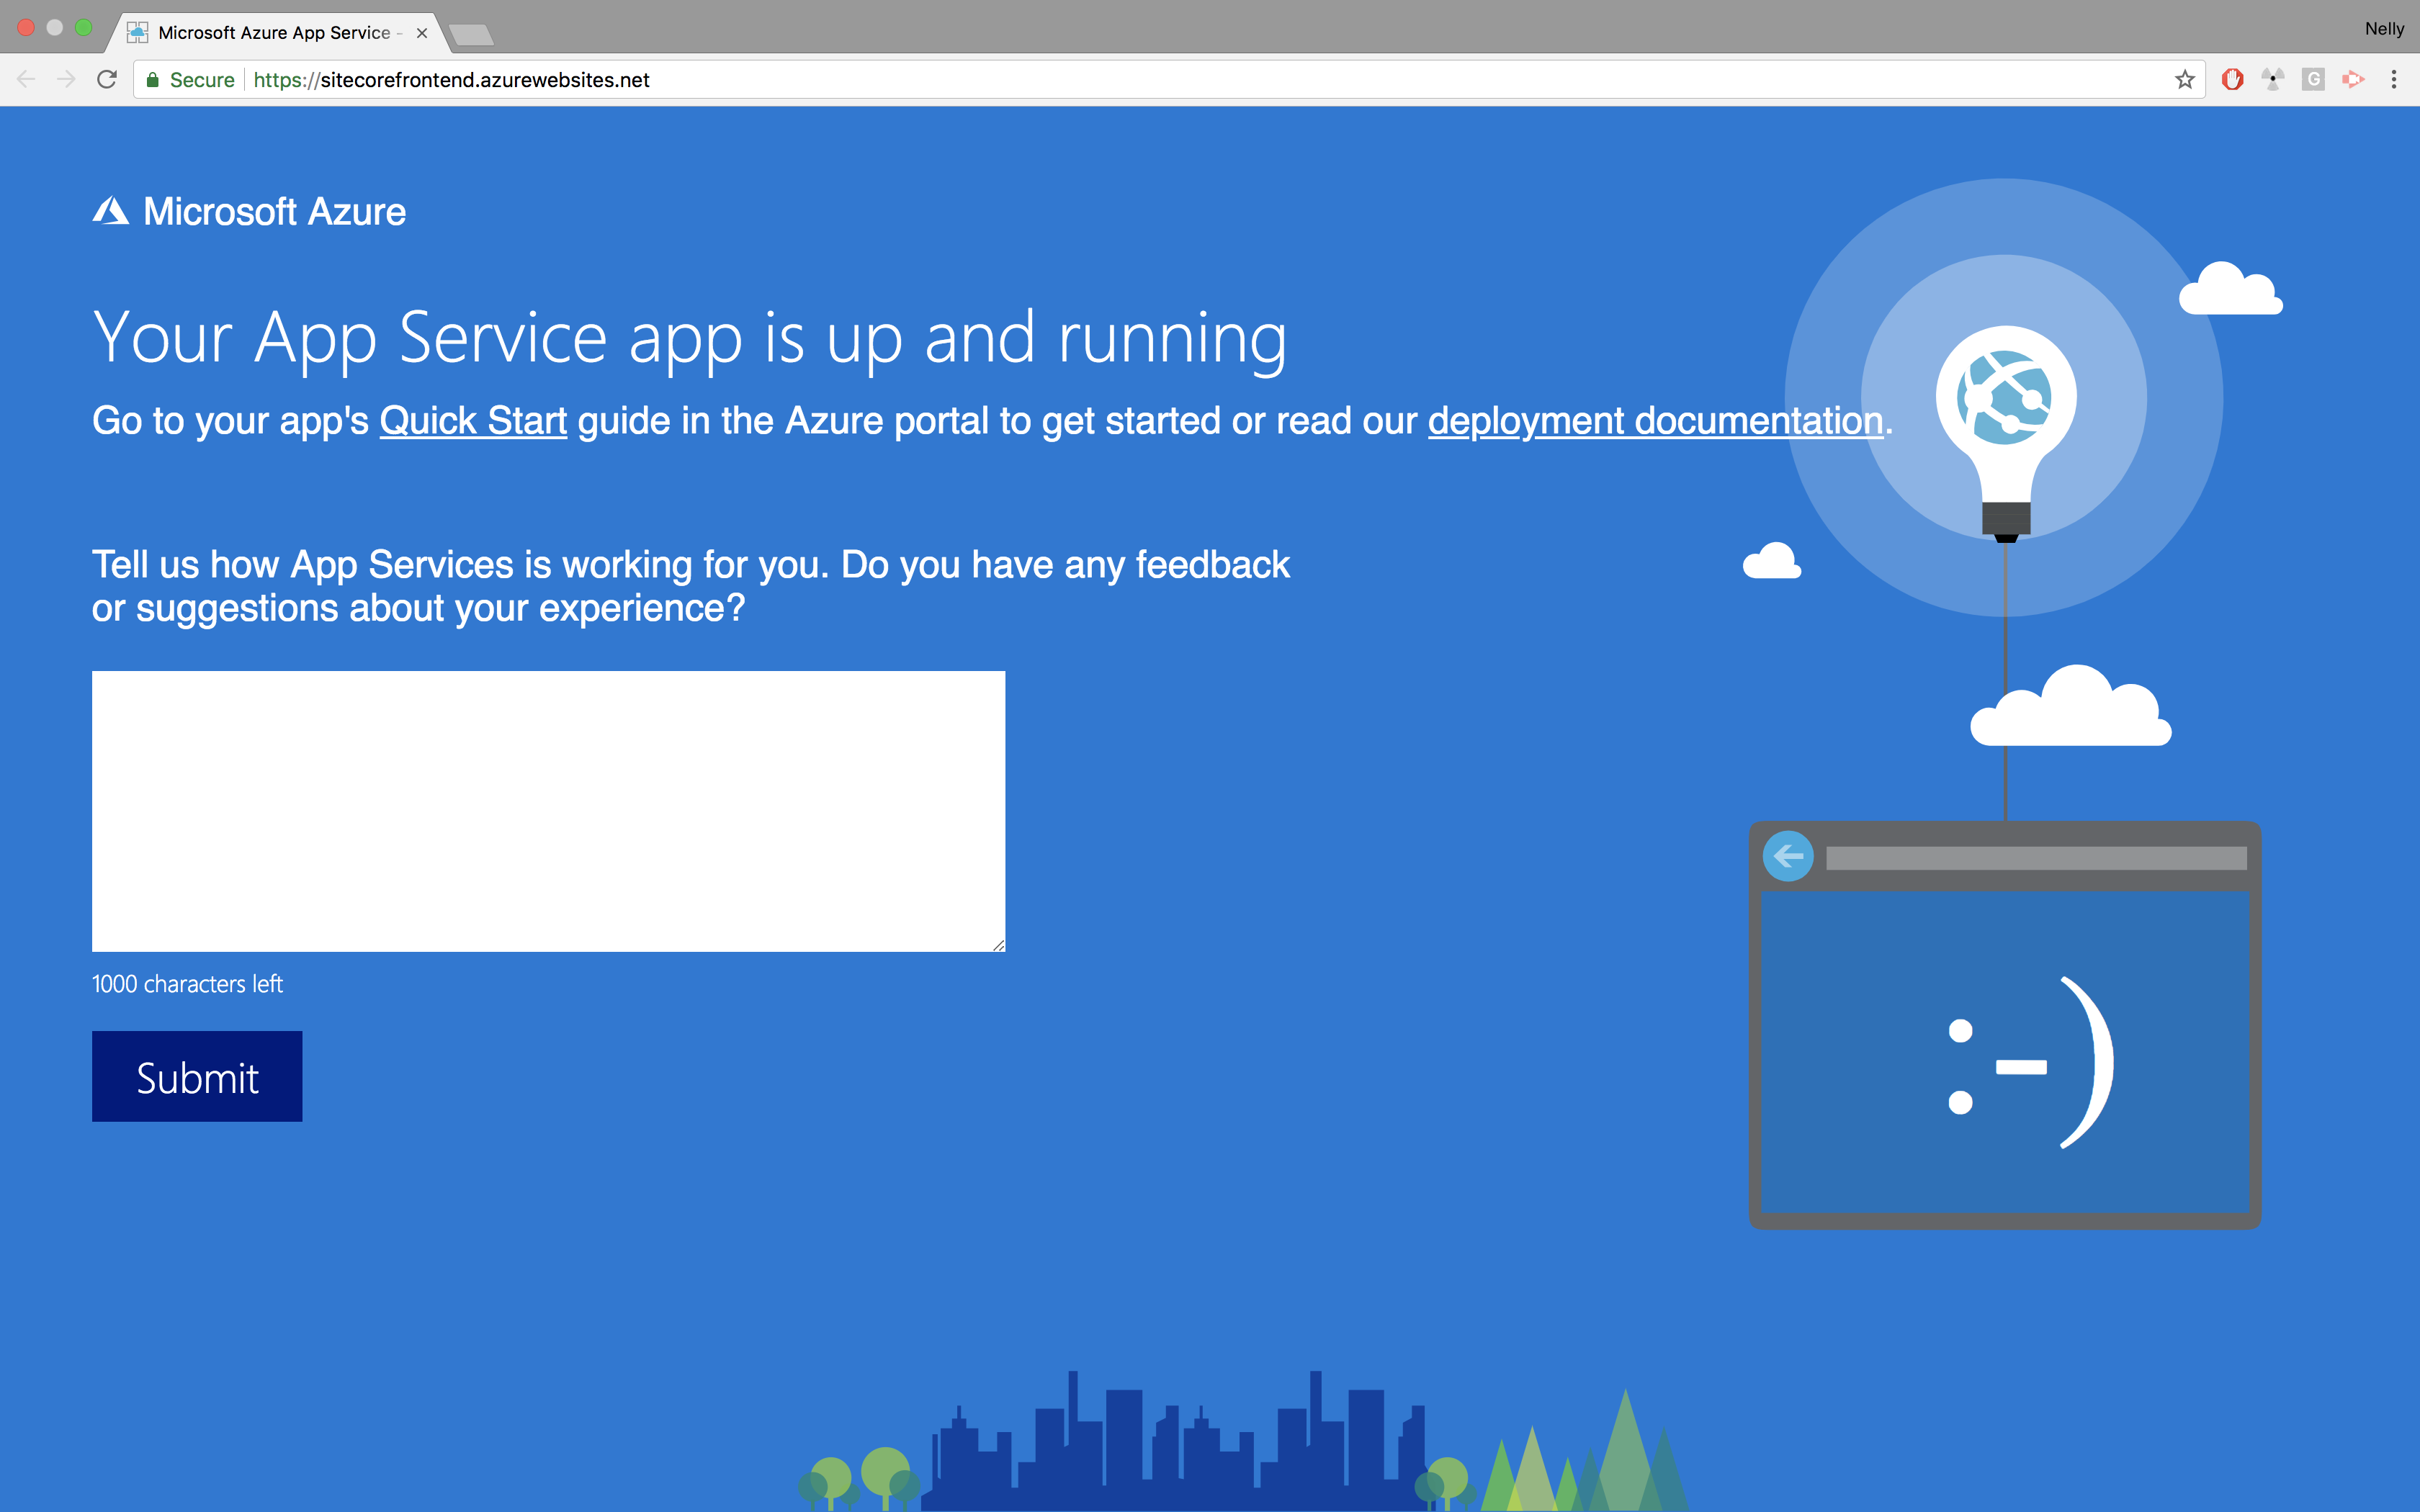
If you click on the domain you will see this page which shows the site is up and running but you have not deployed your code-base yet.
Deploy your codebase
There are several ways to deploy your code base to the Azure including :
1. Deploying the Zip file through ZipDeploy
Navigate to https://
here you can upload your publishable zipped folder. Learn how to create the zip file of your project.
2. Connect Azure Remote to your local Git repository
In order to connect your azure to git repo, you need to configure your git account first:
You can either identify the plan, resource group and app name or the actual site url:
az webapp create --name <app_name:SitecoreFrontEnd> --resource-group <group_name:NodeStaticSite> --plan <plan_name:NodeStaticSiteAppServicePlan> --deployment-local-git

az webapp create --name SitecoreFrontEnd --resource-group NodeStaticSite --plan NodeStaticSiteAppServicePlan --deployment-local-git
Will return your local git url which can be added as a remote repo to your git.
Then we setup azure remote to our local repo. The azure remote lives in the https://<deploy_user_name>@<app_name>.scm.azurewebsites.net/<app_name>.git
git remote add azure https://<deploy_user_name>@<app_name>.scm.azurewebsites.net/<app_name>.git
We will get back this git url:
https://nellysattari@sitecorefrontend.scm.azurewebsites.net/SitecoreFrontEnd.git
We can do it from Portal by clicking on web app=> Deployment Option.
It literally will create a local repository in the App Service.
you need to push the code to azure remote. When prompted for a password, make sure that you enter the password you created in Configure a deployment user, not the password you use to log in to the Azure portal.
git push azure master
The result will be :
Delta compression using up to 8 threads.
Compressing objects: 100% (1025/1025), done.
Writing objects: 100% (1088/1088), 1.48 MiB | 116.00 KiB/s, done.
Total 1088 (delta 204), reused 0 (delta 0)
remote: Resolving deltas: 100% (204/204), done.
remote: Updating branch 'master'.
remote: ..........
remote: Updating submodules.
remote: Preparing deployment for commit id 'd1fa1b63e9'.
remote: Generating deployment script.
remote: Generating deployment script for node.js Web Site
remote: Generated deployment script files
remote: Running deployment command...
remote: Handling node.js deployment.
remote: KuduSync.NET from: 'D:\home\site\repository' to: 'D:\home\site\wwwroot'
remote: Deleting file: 'hostingstart.html'
remote: Copying file: 'app.js'
remote: Copying file: 'package-lock.json'
remote: Copying file: 'package.json'
remote: Copying file: 'bin\www'
remote: Copying file: 'node_modules\.bin\acorn'
remote: Copying file: 'node_modules\.bin\cleancss'
remote: Copying file: 'node_modules\.bin\jade'
 ...
remote: Omitting next output lines...
remote: ...............
remote: Processed 935 files...
remote: Using start-up script bin/www from package.json.
remote: Generated web.config.
remote: The package.json file does not specify node.js engine version constraints.
remote: The node.js application will run with the default node.js version 6.9.1.
remote: Selected npm version 3.10.8
remote: ......
remote: Finished successfully.
remote: Running post deployment command(s)...
remote: Deployment successful.
To https://nodeazuresite.scm.azurewebsites.net:443/NodeAzureSite.git
 * [new branch]      master -> master
This is the most important command which push all the commits into the master and spin up the site with the scripts. Azure tries to determine the type your application. Then will run npm install from package.json file to provide whatever libraries that your application expect to have.
To make Azure able to build your code, you need to either consider the conventions (ex: Node.js needs server.js, app.js, or package.json with a start script) or custom your deployment script
References
- Microsoft walk-through: App service web get started with nodejs
- Channel9: Deploy your site to Azure with Visual Studio Code
- pluralsight: Developing-nodejs in Azure
- pluralsight: Implemeting Azure services
- pluralsight: Implement mobile and web services in azure
- Build and deploy your Node.js app
- Deploy to Azure with VSCode
- VSCode extension for Azure deployment
- build your NodeJs App
- Create CI/CD for Azure Deployment in VSCode
- Deploy your code through Git to Azure Remote
- Config Local Git for App Azure